How to test accessibility using automated software
Purpose
Determine a wep page/app's WCAG conformance level using automated accessibility-scanning software. This page documents how to do this using Deque Systems, Inc.'s (pronounced "D Q") axe DevTools browser extension.
What to look for
The accessibility scanning software will highlight any WCAG violations it detects, so you don't necessarily have to "look out" for anything when using automated solutions like this. axe DevTools will tell you exactly what it thinks is wrong and will provide solution examples that might help.
Method: automated in-browser testing
Here's how to test a page in your browser for WCAG errors using UIC's recommended automated solution, the axe DevTools browser extension. axe DevTools is maintained by Deque Systems, Inc. (pronounced "D Q"), which is one of the more robust and informative scanners available today. Remember, auto-scanning accessibility software currently can flag no more than 40% of all potential accessibility errors, so it's not good enough to just use the browser extension. To reduce the probability of accessibility issues reaching production environments, you must use the other manual techniques documented on this site in addition to this automated test before committing and pushing any code changes.
- Install the axe DevTools browser extension, which is available for Firefox, Chrome, and Edge.
- Open axe DevTools by opening your web browser's built-in "Web Developer Tools" or "Developer Tools" panel (Mac shortcut: ⌥ ⌘ I) and select the "axe DevTools" tab. You may drag it to the left in the tab listing for easier access.
- Click the "Scan ALL of my page" button.
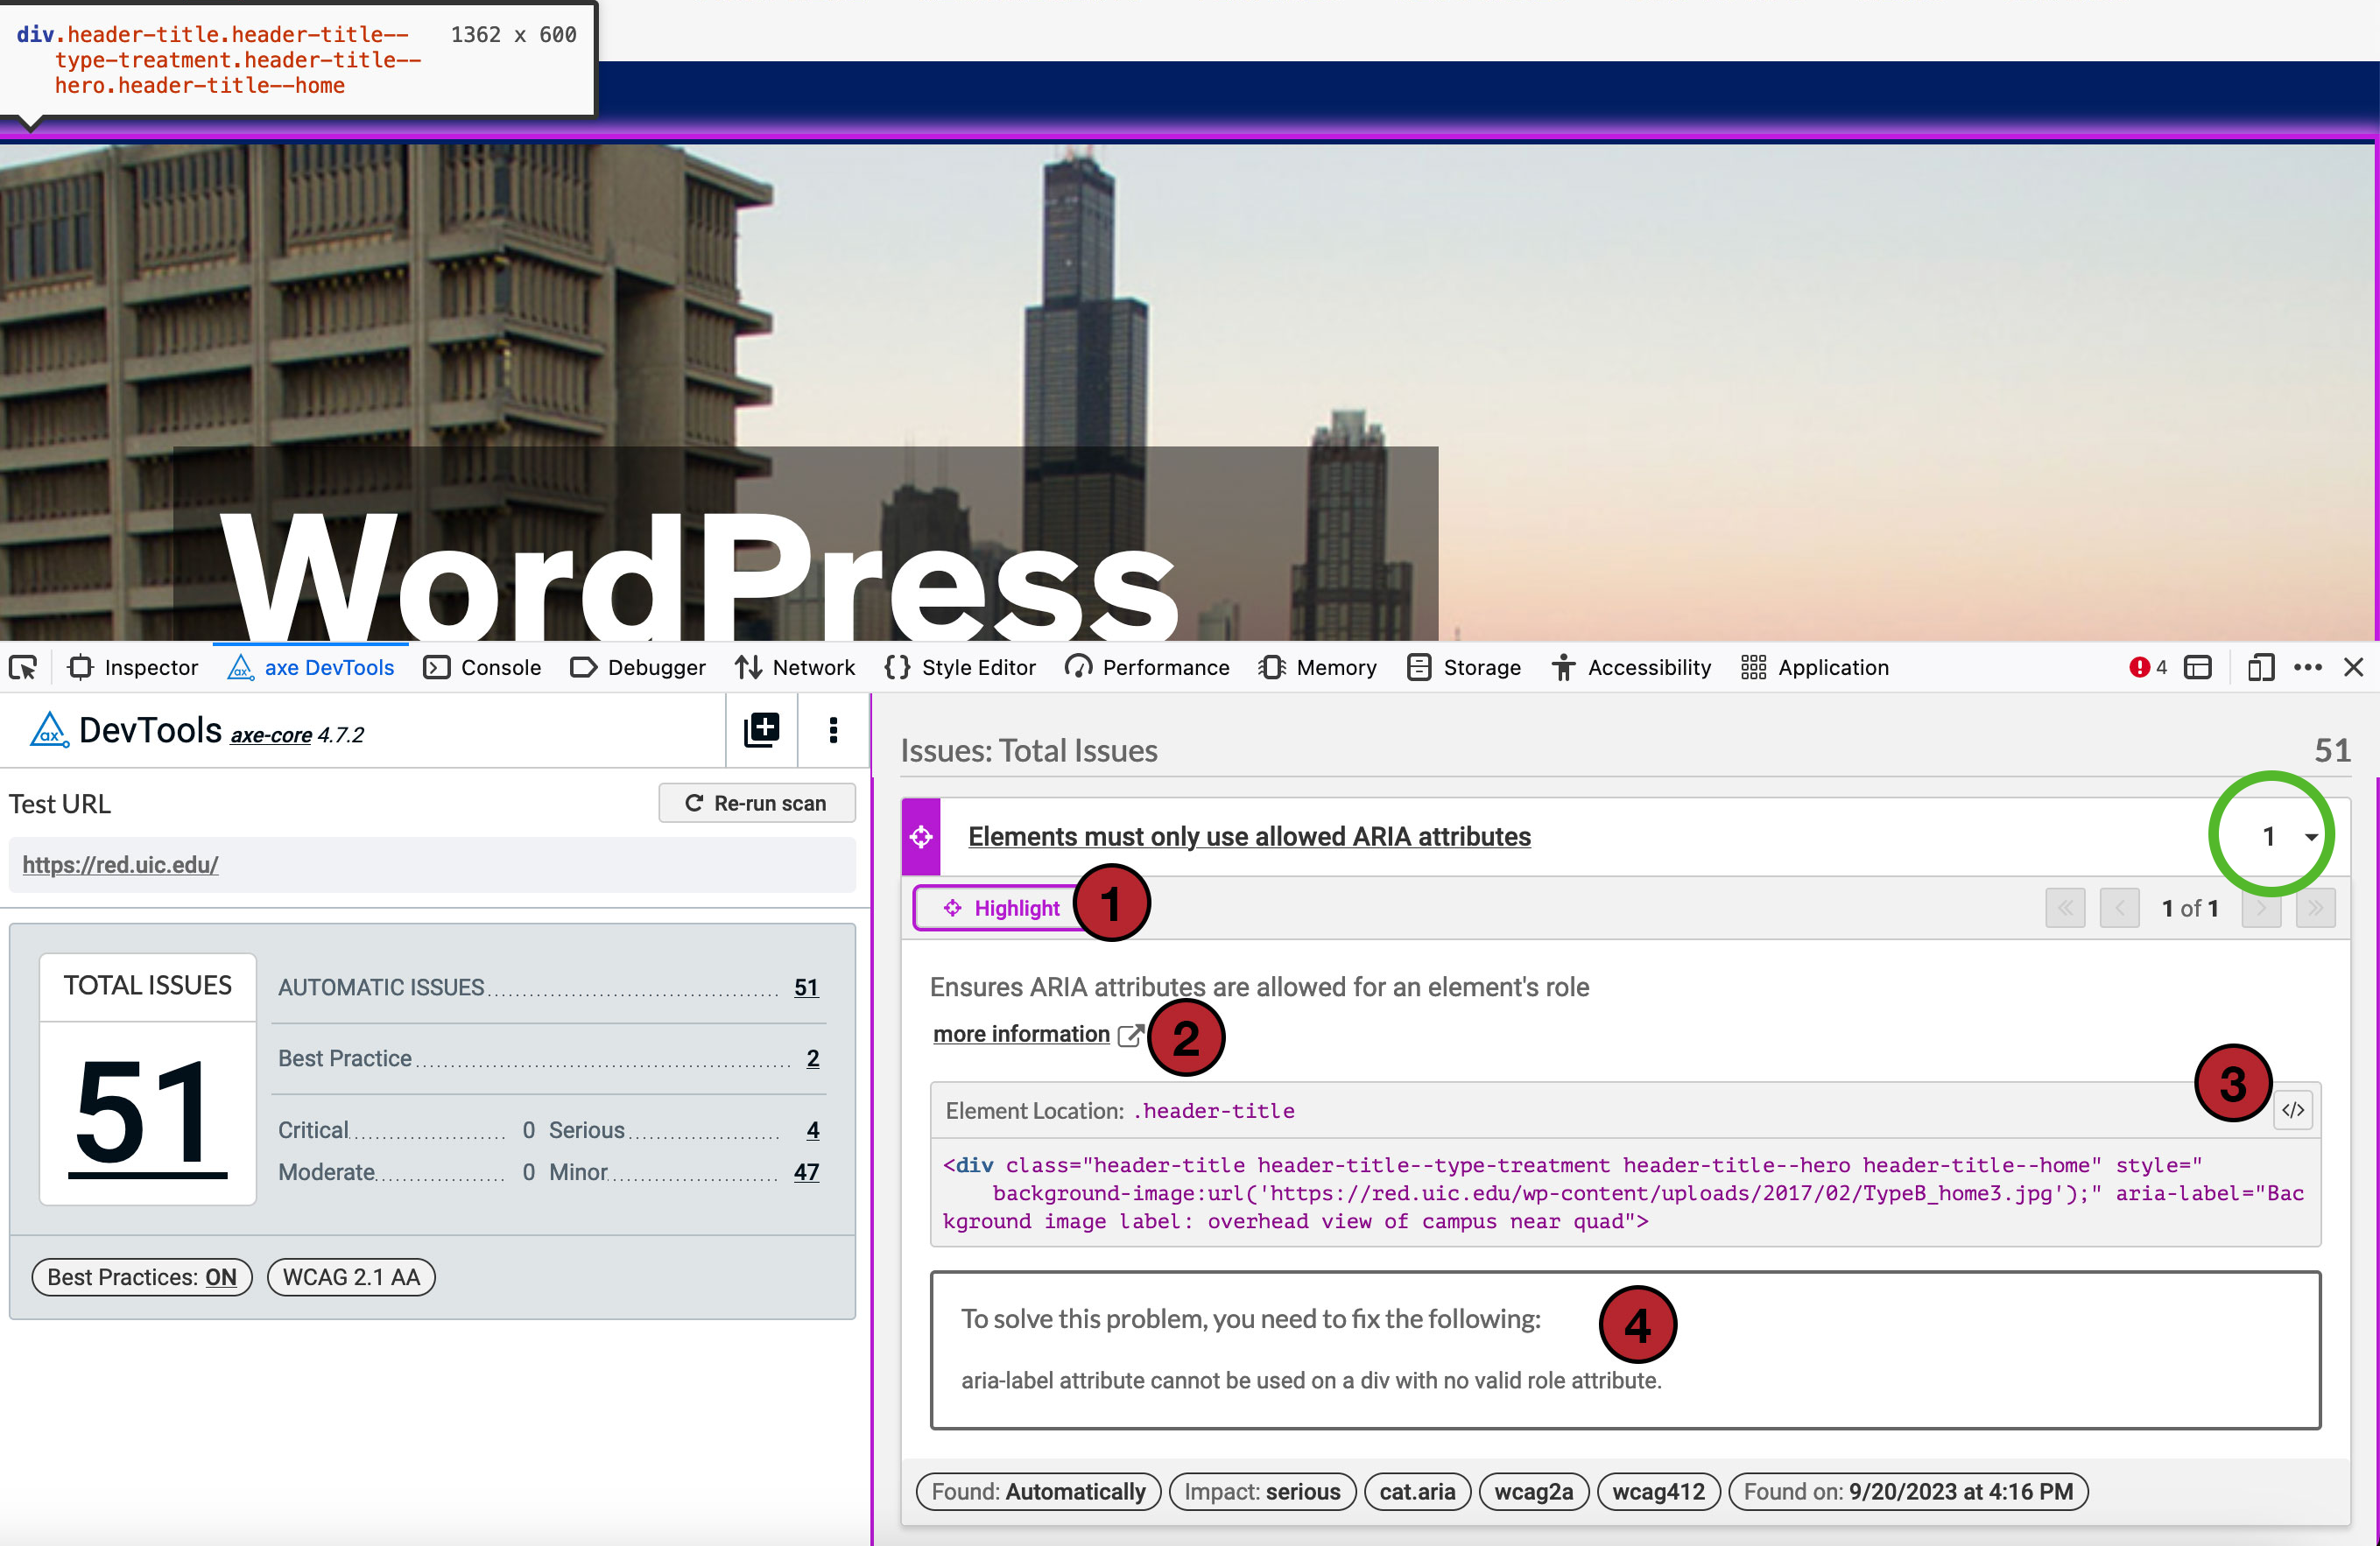
- When it's finished scanning, the extension will display results in a split-panel interface; on the left you'll find an issue summary, organized by the severity of all potential WCAG violations found on the page, while on the right you'll find an collection of accordion-style collapsible boxes containing details about these issues. Make sure the "Best Practices" option is set to "On."
- Let's investigate the first issue on this example page, "Elements must use only allowed ARIA attributes." Click on the accordion to expand its contents. The first thing to note is the number on the right side of the accordion title, highlighted by the big green circle: this represents the total number of occurrences of this issue type found on the page.
 The number in this area will decrease, obviously, as you address that particular issue on the page and refresh the scan results, but it's worth noting that the count can also be affected by repairing other (even seemingly unrelated) accessibility issues. These issues can overlap, so it's not out of the ordinary to see multiple issues resolved by a single code change.
 - Next is the "Highlight"
 link, which will wrap the issue in a highly-visible purple outline in the browser viewport. Please refer to annotation number one in the screenshot. The element highlighting is a handy feature, but results will vary depending on the object's state/visibility. If there are multiple occurrences of this issue, you can click the "Next issue" and "Previous issue" to scroll through them.
 - The "More information" link
 takes you to the Deque University entry for the issue. The issue we're looking at, "Elements must use only allowed ARIA attributes," goes to https://dequeuniversity.com/rules/axe/4.7/aria-allowed-attr. Deque's help page has a lot of helpful information, including suggested fixes that should address the issue and a summary that explains why it's important to fix it.
 - Just below that "More information" link is a small grey box with the "Element location," which is an excerpt of the page markup where you can find the WCAG error. Please note the little button to the right
 (it says "Inspect Element" on hover) will open the browser's Element Inspector tab and select the problem element. This button can also be found in the section below that says "To solve this problem, you need to fix the following:"
  , so keep in mind you have multiple ways to directly view the source of the accessibility issue.
 - When you have made your code changes and want to verify if your fix works, click the "Re-run scan" button in the axe DevTools panel. If your code fix works, there should be at least one fewer issue listed in total.
Method: Color Contrast Testing and Fixing
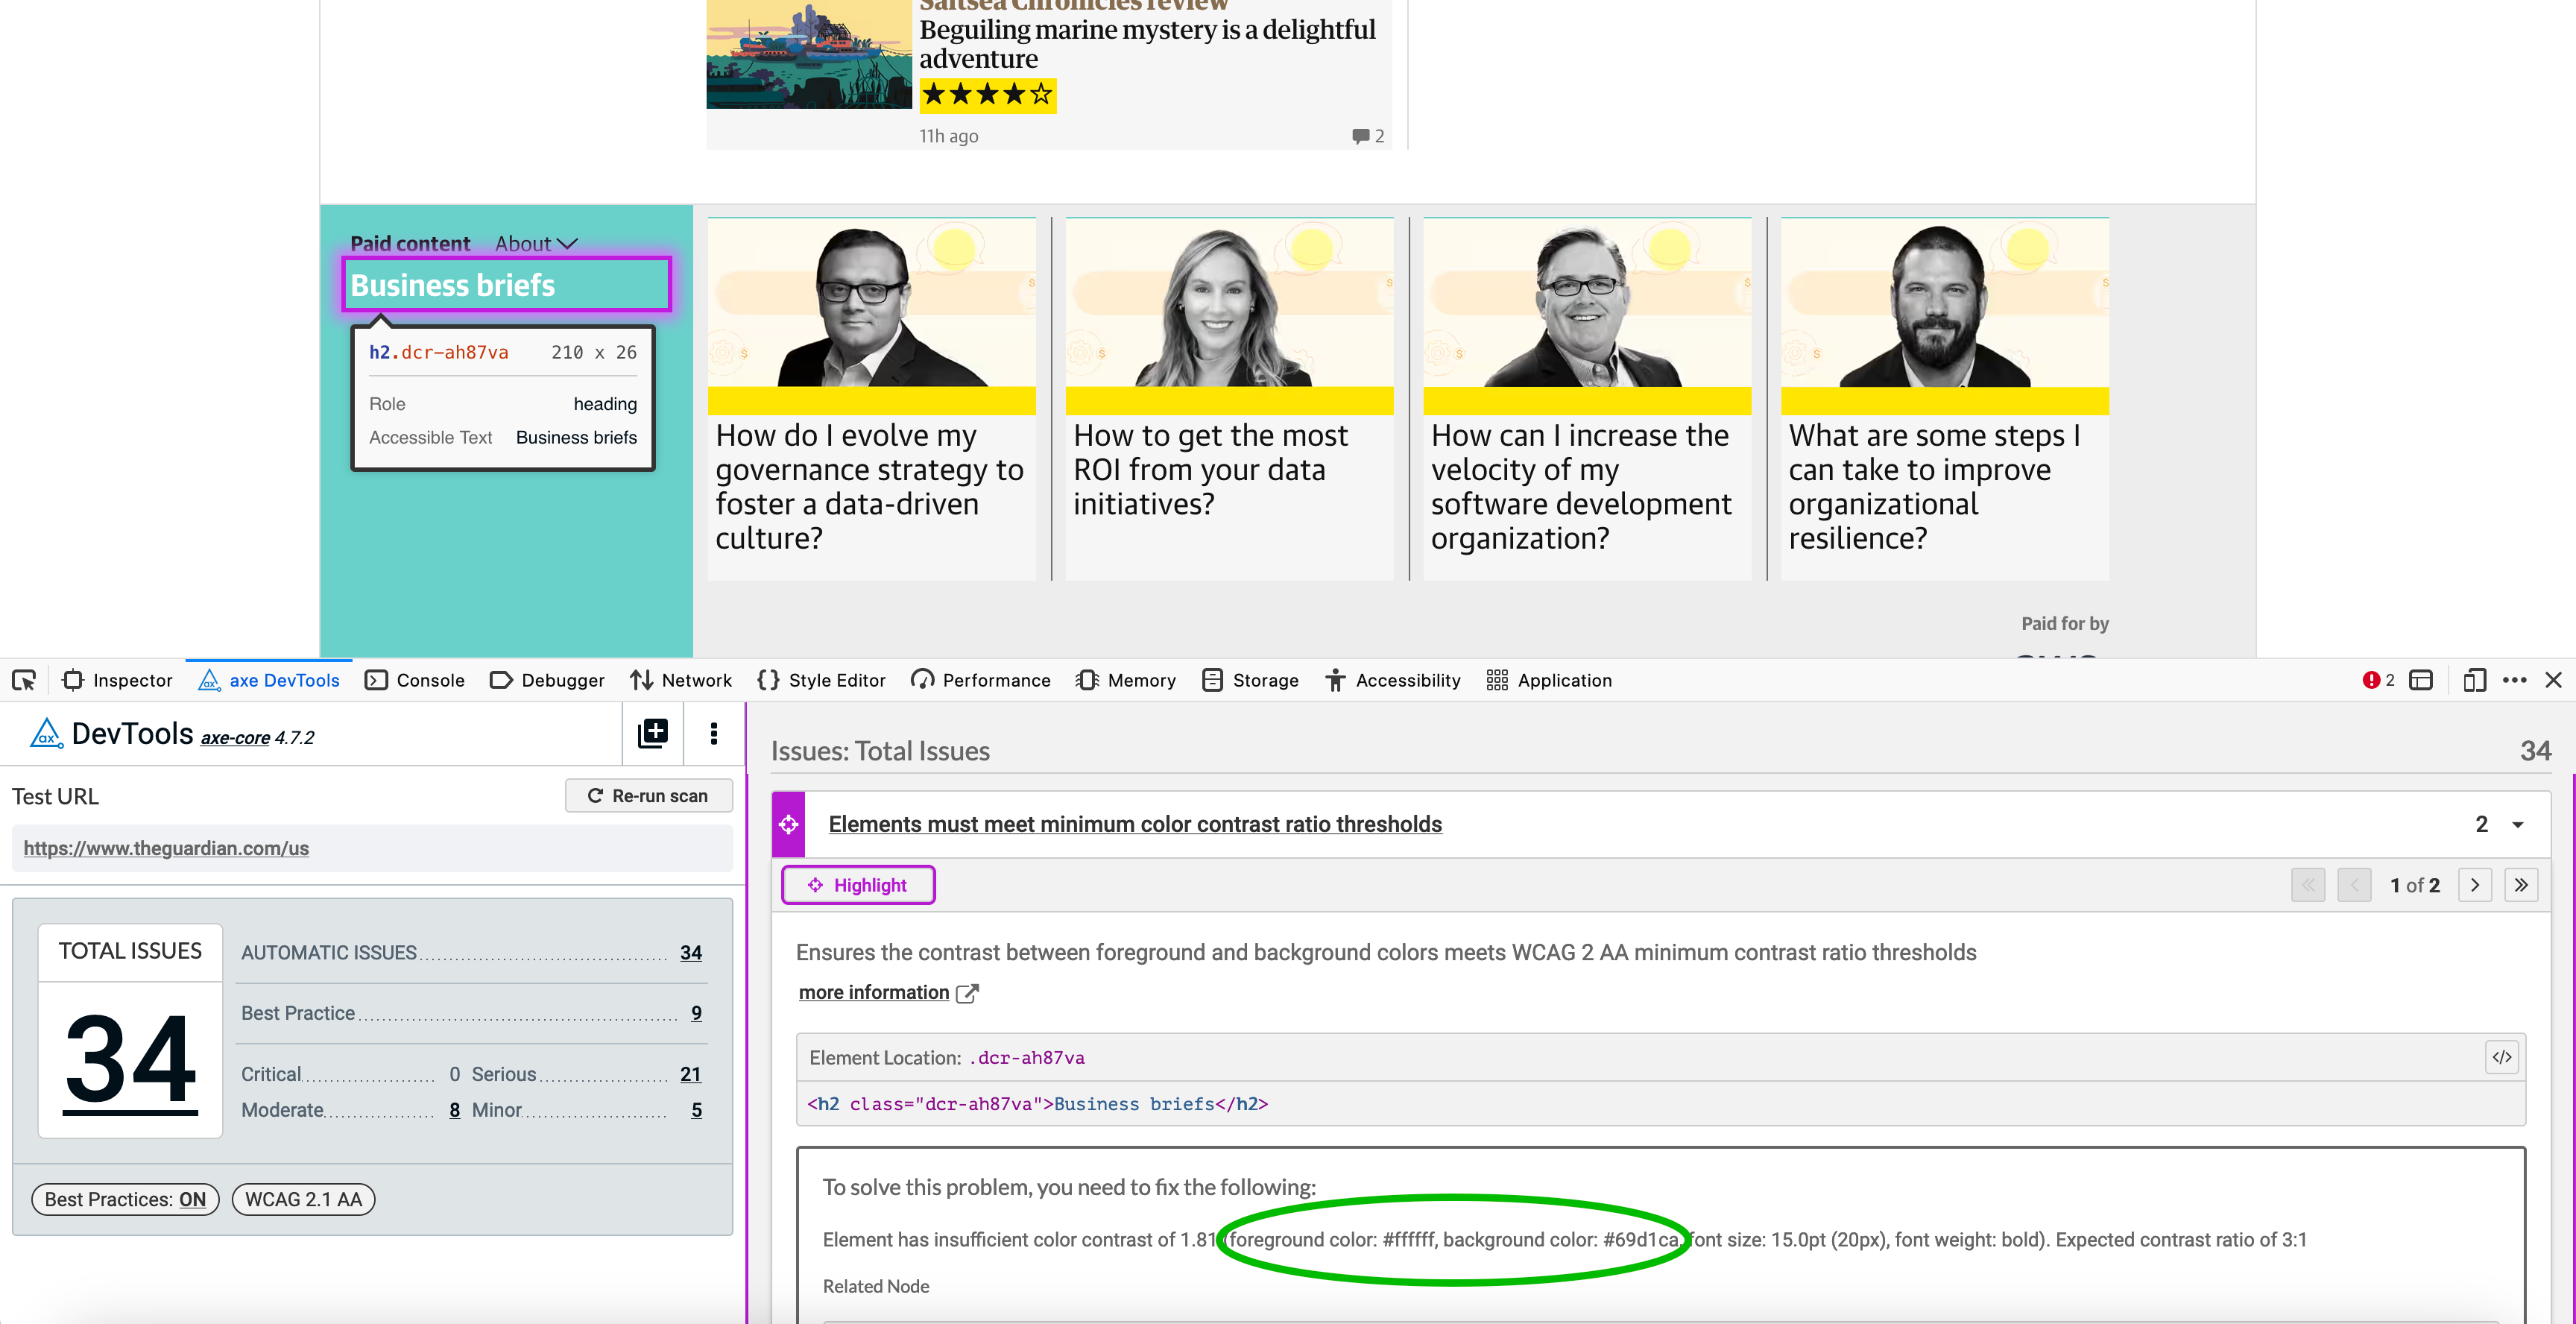
axe DevTools will flag elements with color contrast issues and return the offending foreground and background hex codes (as seen in the screenshot below), but it doesn't suggest hex changes that would help you meet the 3:1 contrast ratio requirement. You'll have to copy them and fix them somewhere else manually, which can be a cumbersome process.

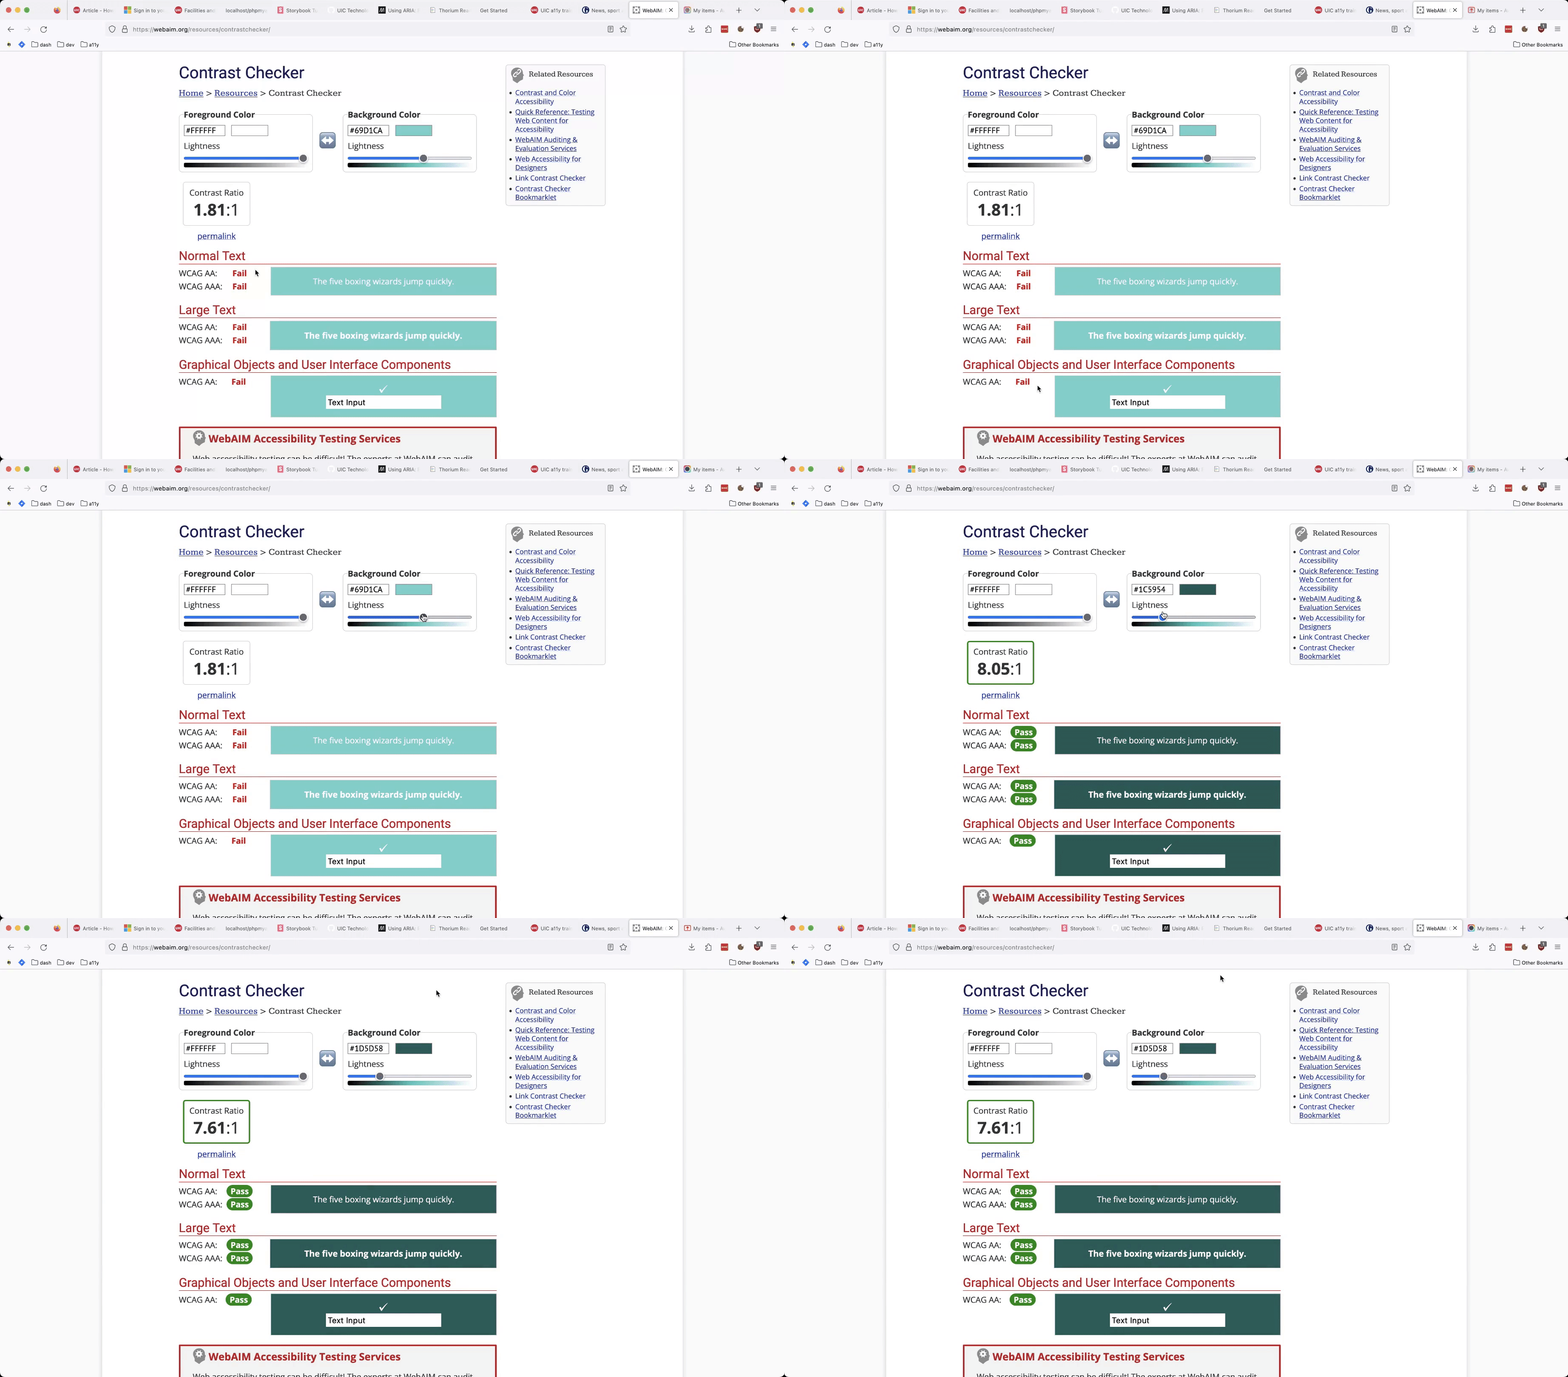
However, rather than switching back and forth between your local IDE, a photo-editing app like Photoshop, and your web browser, try using an interactive online color contrast utility like the WebAIM Contrast Checker in a neighboring browser tab. It'll save you some time and keep your workflow from getting too unwieldy.
